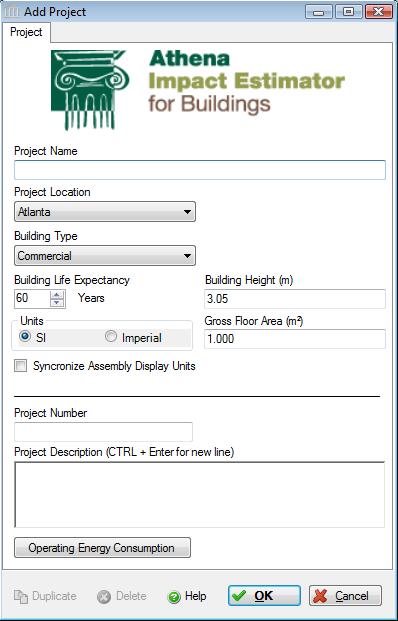
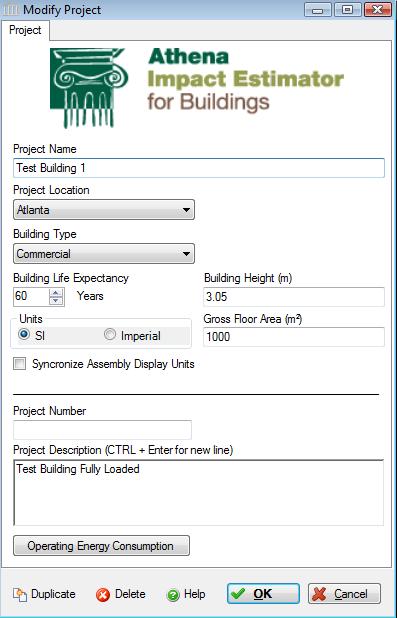
Add or Modify a Project
 |
 |
This dialog can be used to:
- add a new project and to capture some general project information, or
- modify general project information for an existing project.
Field Descriptions
- Project Name:
- Enter a name for this project. The name must be unique. This information must be entered because it activates a number of critical functions in the application.
Project Location:- Click the arrow button and then select the location for the project. This piece of information must be entered because it activates a number of critical functions in the application.
- Atlanta
- Baltimore
- Calgary
- Halifax
- Los Angeles
- Minneapolis
- Montreal
- New York City
- Orlando
- Ottawa
- Pittsburgh
- Providence
- Quebec City
- Seattle
- Toronto
- USA
- Vancouver
- Winnipeg
Building Type:- Click the arrow button and select the building type which best describes the project to be modelled. This is not an optional field.
- Commercial
- Industrial
- Institutional
- Multi Unit Owner-Occupied
- Multi Unit Residential-Rental
- Office Owner-Occupied
- Office Rental
- Single Family Residential
Building Life Expectancy:- Manually enter a life expectancy or click the arrow buttons to increase or decrease the building life expectancy by 20 year increments.
Units:- Set the default units of measure as either "SI" or "Imperial" that will be used when entering new assemblies to the project. Changing the default units here will affect new assemblies that are subsequently added to this project but will not override the Units of Measure settings for other open projects or any previously created assemblies within this or other open projects. While the inputs to the application can be specified as either imperial or (SI) metric, the internal application working units are metric.
Synchronize Assembly Display Units:- Choose to synchronize the display unit for all assemblies belonging to the current assembly with the selected "Units". If this checkbox is checked then when the "OK" button is clicked, the display unit for all assemblies in the project will be updated to be synchronized with the selected project "Units" value.
Note: This will not affect the display units of any assemblies that are being edited (e.g., a Modify Assembly form is open) at the time that the "OK" button is clicked.
Building Height:- Enter the building height from the lowest sub-grade point to the highest above grade point. This value is later used to calculate construction effects due to using a crane to move some materials. This is a mandatory field and has a default value of 3.05 m (e.g., 10 ft).
Gross Floor Area:- Enter the gross floor area. This value is later used to have the results summarized on a unit floor area basis, but is an optional field.
Project Number:- An optional field for use by the user.
Project Description:- An optional input field for use by the user to provide a brief description of the project.
Operating Energy Consumption:- Click this button to invoke a dialog box for entering annual operating energy consumption for the building.
Duplicate Button- Click the "Duplicate" button to create an exact duplicate of the current project and adds it to the Impact Estimator Tree Control Window. This button is only available when editing or viewing a project that is currently open in the Tree Control Window.
Delete Button- Click the "Delete" button to delete the current project from the Impact Estimator Tree Control Window. This button is only available when editing or viewing a project that is currently open in the Tree Control Window.
Help Button:- Click the "Help" button to open the Help pop-up window.
OK Button- Click the "OK" button to accept and save the current project settings and close this dialog.
Cancel Button- Click the "Cancel" button to discard the current project settings and close this dialog. If adding a new project, the new project will not be created.