Add or Modify a Roadway Maintenance and Rehabilitation Schedule
Summary of Rehabilitation Activities
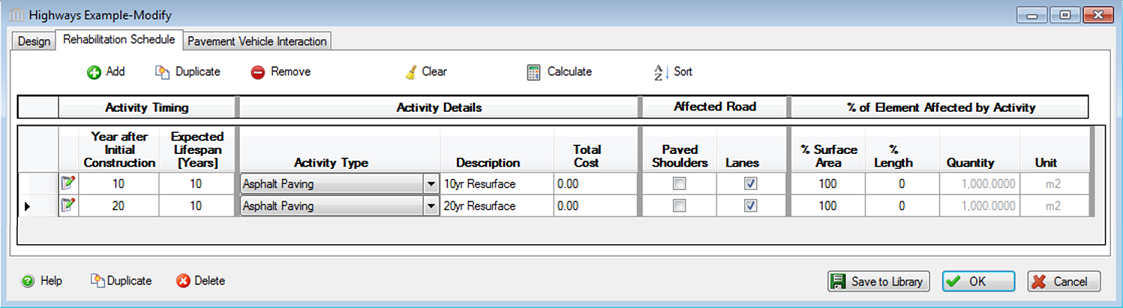
Summary of Rehabilitation Activities
 Add:
Add:- Click this button to add an activity to the maintenance and rehabilitation table. When you add a new activity, the child form will open and you can fill in the details of that activity.
 Duplicate:
- Click this button to duplicate the selected activity in the maintenance and rehabilitation table.
 Remove:
- Click this button to remove the selected activity from the maintenance and rehabilitation table.
 Sort:
Sort:- Sorts the activities, first by year, then by sequence number. If you want to sort by an individual column, click on the column heading.
 Clear:
- Click this button to all the activities from the maintenance and rehabilitation table.
 Calculate:
- Click Calculate to recalculate the material volumes in this table when the roadway design has been changed in the Design form, but Ok has not been clicked to save the changes.
 Edit:
Edit:- Click this button to open the "Detailed Activity" form and edit the activity details. The visible fields in each row of the parent form can be edited in the "Summary of Rehabilitation Activities" form, but the "Detailed Activity" form must be opened to edit all the fields for each activity. Clicking this button launches the "Add or Modify a Roadway Maintenance and Rehabilitation Schedule Record" dialog.
Activity Timing:
- Year After Initial Construction:
- Enter the number of years after the initial construction that the activity is scheduled.
Expected Lifespan:- Enter the expected lifespan, in years, that the activity is scheduled to last before replacement or repair. This is used to prorate the effects of any activities whose expected lifespans extend beyond the overall project lifespan.
Activity Type Details:
- Activity Type:
- Choose the Activity Type, this will determine which equipment is used for the activity and specify the list of choices available in the Specific Activity column.
Specific Activity:- Choose the specific activity in the maintenance and rehabilitation schedule.
Description:- Enter a user defined description or name for the activity.
Total Cost:- The user can enter the total projected or current (not Net Present Value) cost for the current rehabilitation activity. It is the intent that these costs will be exported to an LCC tool where discount rates etc. will be applied.
Affected Road Element:
- Paved Shoulders:
- Choose this if the activity is to be applied to the paved shoulders. This and Paved Lanes can both be selelcted at the same time if this activity applies to both shoulders and lanes.
Paved Lanes:- Choose this if the activity is to be applied to the lanes. This and Paved Shoulders can both be selelcted at the same time if this activity applies to both shoulders and lanes.
Affected Road Element Details:
- % Surface Area:
- The percentage of the roadway's surface area that is to be affected by the activity. This and % Length are mutually exclusive, if one is selected, the other will be unselected.
% Length:- The percentage of the roadway's length that is to be affected by the activity. This and % Surface Area are mutually exclusive, if one is selected, the other will be unselected.
Quantity:- A value, calculated automatically, depending on the the roadway design, and whether the paved shoulders or lanes is chosen, and the percentage of either surface area or length. You cannot edit this value.
Unit:- The unit of measure for the activity depending on whether you have entered a percentage of surface area or length.
Roadway Assembly Form Buttons:
- These buttons, at the bottom of the Roadways Assembly form affect the entire assembly (Design, Rehabilitation and PVI).
 Help Button:
- Click the "Help" button to open the Help pop-up window.
Duplicate Button- Click the "Duplicate" button to create an exact duplicate of the current assembly. The duplicate assembly will be added to the current project. This button is only available when editing or viewing an assembly that has already been saved in the current project.
 Delete Button
- Click the "Delete" button to delete the current assembly from the current project. This button is only available when editing or viewing an assembly that has already been saved in the current project.
 Save to Library:
- Click this button to save the current design to the roadway library. Any user library designs are available, along with the database designs, in the Scenario drop down list in the Survey section of this dialog and will be available in any new or existing projects.
 OK Button
- Click the "OK" button to accept and save the current design settings and close this dialog.
 Cancel Button
- Click the "Cancel" button to discard the current assembly settings and close this dialog.